We saw a Twin Adirondack Chair for sale at a local hardware store and loved it. It was unpainted wood and cost about $400.00! We decided to check and see if we could find plans for one online and build one ourselves. Bingo! We found this site by Woodcraft.com. They have soooo many plans to choose from, toys, holiday items, furniture, and of course Adirondack chairs. We ordered the plans, some transfer paper, and a package of hardware for $37.29 / $42.28 with tax and shipping. This is what arrived in the mail.
Inside we found: Instruction book, hardware packet, transfer paper, 2 sets of patterns (all for the same chair).
The instructions told us exactly what to buy and were very easy to follow. The pattern pieces reminded me of my old sewing days. We were off to a happy start.
Of course, you do have to have one of these! As well as a miter saw.
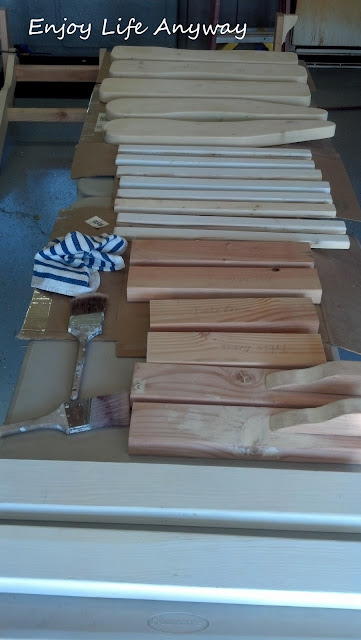
After all the pieces were cut they were sanded and primed we began assembly. Our good friends at Sherwin-Williams Paint recommend this deck sealer for the primer as we did not use salt treated lumber.
This is the one of the 4 pieces that make the chair backs adjustable! They will actually lay all the way down if we want them to.
The turquoise blue paint is a whole nother (that actually is a word here) story. I had purchased a can of what I thought was white exterior high gloss paint for another project. When I began using it I noticed something wasn't right. It wouldn't cover anything and was almost clear when painted on. Then I looked at the can again and realized I had gotten a can of base paint that required tinting. I had gone back to the store for the paint I originally intented to buy but now I had this can of untinted paint that I was not going to waste. So we took it back to the store and asked to have it tinted and we picked out a color. The clerk made a mistake and the paint came out a very dark and different color than we had chosen. Since some of the paint had been used he added as much white paint to it as he could and we ended up with the color you see. I actually love it! Its sort of a beachy turquoisy blue.


I love these; Great job! When all said and done, how much was spent bc wood can get expensive?
ReplyDeleteThe wood costs about $95.00. We used pine, not salt treated lumber. The salt treated would have been a lot more expensive but also a lot less work. I can't say how much we spent on paint. We got a gallon of sealer/primer and used less than a quart of it. We went ahead and got a gallon because we have other projects. We already had the paint and used less than a quart of that. I would love to see your pictures if you decide to make this. Thanks for your comments.
DeleteThis comment has been removed by the author.
ReplyDeleteLove these chairs! Can you post a link to the woodcraft pattern you used?
ReplyDeleteSure!! http://www.woodcraft.com/Product/2081903/32361/Twin-Adjustable-Adirondack-Chair-Plans.aspx
DeleteIf I had the equipment needed, I'd make this in a heart beat. You did a great job.
ReplyDeleteThanks Janice! It does take some special tools, and someone who can use them! lol In my case it was my husband.
DeleteHi
ReplyDelete2 days ago, I told about about Jim's WoodProfit course.
==> Over 16,000 Woodworking Plans
I've spoken on the phone with Jim Morgan and I'm just
blown away by his simple and effective strategy to
make money using his basic woodworking skills.
He started his woodworking business with NO capital,
a few shop tools, and a lot of nerve, in a small
10x20 foot space and grew it into a 1,400 space in
the first few months while still remaining as a
one-person business!
See his story at: ==> All the woodworking tools you will need
Now if you want earn some pocket money during this
recession and run an easy to start and fun business,
then you'll LOVE this guide.
It contains all the information you need to start making
money from the very first job...
Check it out now as the offer ends in 2 days: ==> Diagrams which are detailed with a full set of dimensions
===============
URGENT UPDATE:
===============
I've been told by Jim that there's only *8* slots left
for the free bonus and one-on-one coaching.
Once he fill up these last 8 spots, I can assure you
it will not be repeated.
So I urge you to get the bonus and be among the 8 people: ==>Step -by-step instructions how to start your project
Your Name
P.S. P.S: My favorite section of the guide
is where Jim gives you 10 of his TOP-
SELLING wood crafts. This is really the
"golden-goose" for woodworking businesses.
Click here to visit his site now: ==> The necessary materials for that particular project
Thanks for a very interesting blog. What else may I get that kind of info written in such a perfect approach? I’ve a undertaking that I am simply now operating on, and I have been at the look out for such info. Best Adirondack Chairs
ReplyDelete